
- |
- |

I recently presented at WordPress Melbourne User Group on the WordPress plugin Contact Form 7.
I thought it might be a good opportunity to share some knowledge on the plugin, how it’s implemented, and introduce some extra features that you might find useful.
For anyone who’s already familiar with the plugin, I’d be interested to hear what you think of it in the comments below. Or if you have any questions about it, I’d be more than happy to give you a hand. Just post your question below.
If you’re a developer looking for some handy instructions on installing this plugin, then keep reading: this article is definitely for you. If you’re not a developer and you’re using WordPress to manage your website, then some of the instructions I mention may not be relevant to what you’re doing. Still, the extra features are good to know, and – hey – you can always learn more about open source software!
So, what is Contact Form 7?
Broadly speaking, it’s a plugin for WordPress that allows you to create and manage contact forms. You can easily manage multiple forms with the plugin and you have the ability to customise content in the form using simple markup. The plugin also supports Ajax-powered submitting, Akismet spam filtering and more.
I like using this plugin because it’s not only easy to operate, but it’s versatile too. You can use it for feedback forms, event sign ups, newsletter registration, job applications, register downloads or proposals. Basically, any type of form or process that might require document upload.
Contact Form 7 has some great support documentation if you need to work out how to do something specific and there are heaps of extensions that enhance its usability for all sorts of websites.
I’m going to focus on getting started with Contact Form 7 now, and then mention a couple of extra plugins that are helpful to use alongside it.
Getting started with Contact Form 7.
Installing the plugin is pretty easy – you can download it from here. Don’t forget to unzip the file! Once that’s done, upload the entire contact-form-7 folder to ‘/wp-content/plugins’ directory.
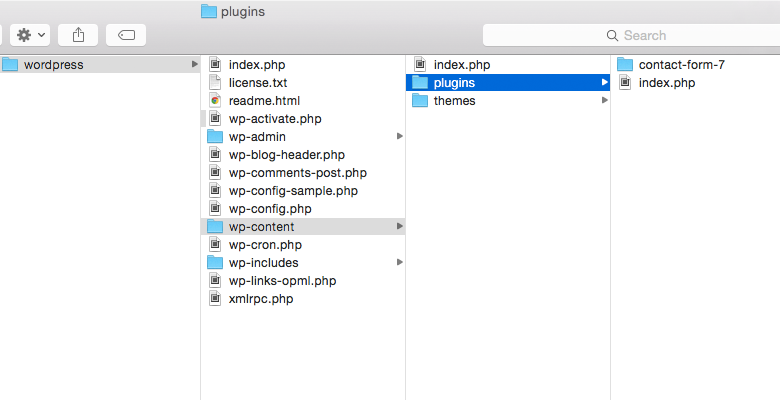
Then, activate the plugin through the ‘Plugins’ menu in WordPress.

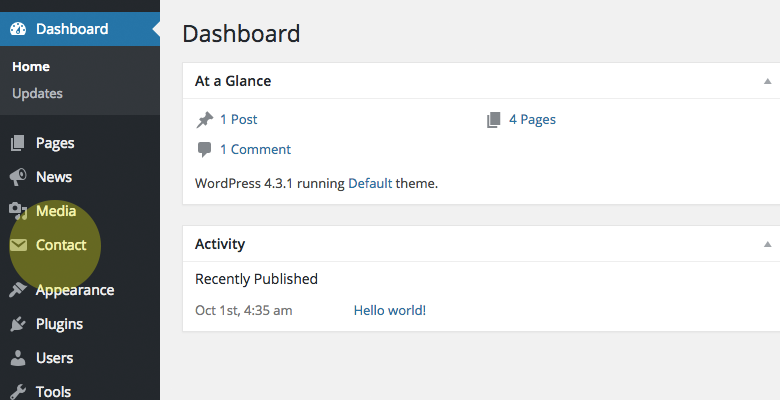
Once you’ve installed and activated the plugin, you’ll find it under ‘Contact’ in your WordPress admin side menu.
So, let’s get started and create a form.
Click ‘Add New’ and name your form. Once you’ve named it, grab the short code you can see under the name and paste it into the body copy field of your webpage. This will display the form on the front end of the website.
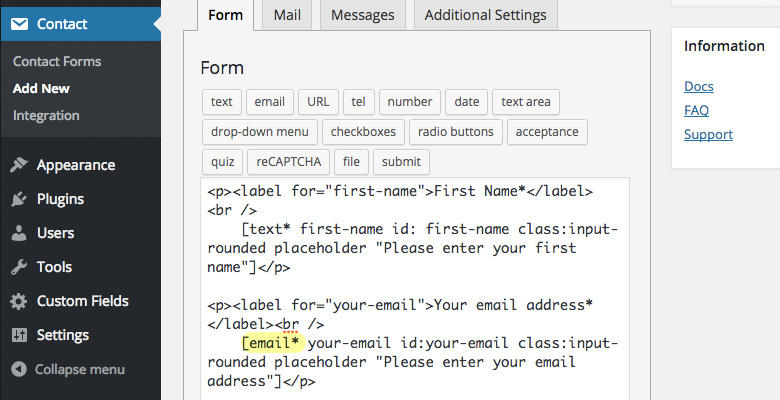
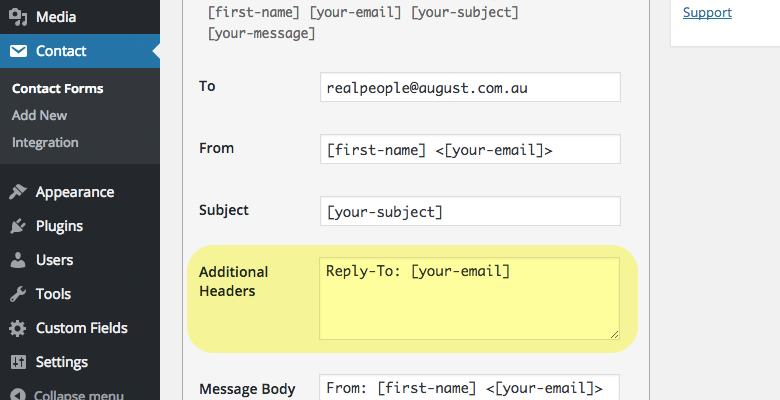
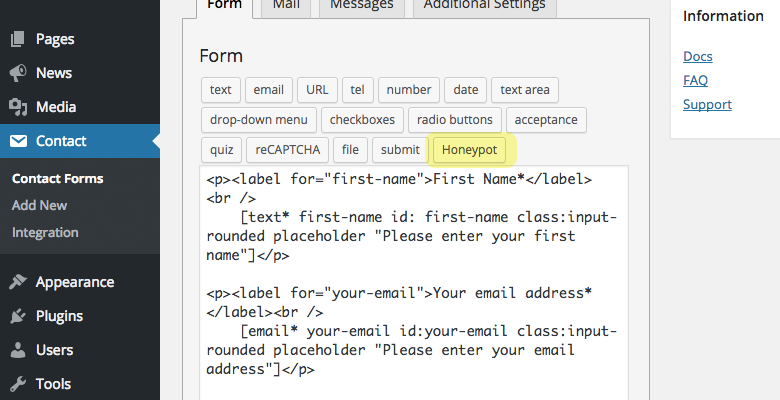
In the screenshot below, you can see four tabs.
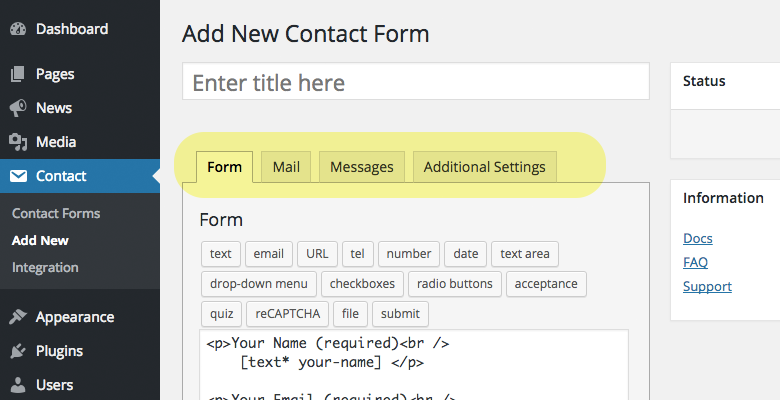
Form: this is where you build the form and the different fields that are included in the form.
Mail: this is where you configure the email notifications that are sent after the form has been submitted.
Messages: here, you can customise the various messages that may be shown, i.e. “this field is required” or “message sent successfully”.
Additional Settings: there are some extra features that can be applied to a form, such as demo mode and the ability to run a custom JavaScript function after form submit. Find out more here.
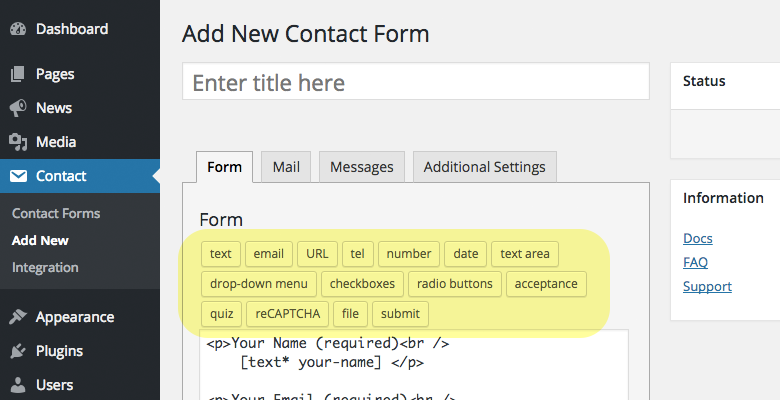
Let’s stay on the Form tab for a moment.
The highlighted area below are the types of tags, or form fields, that you can add to your form. It’s simply a matter of selecting the ones you want to add in. There’s also extra documentation available on each field here.
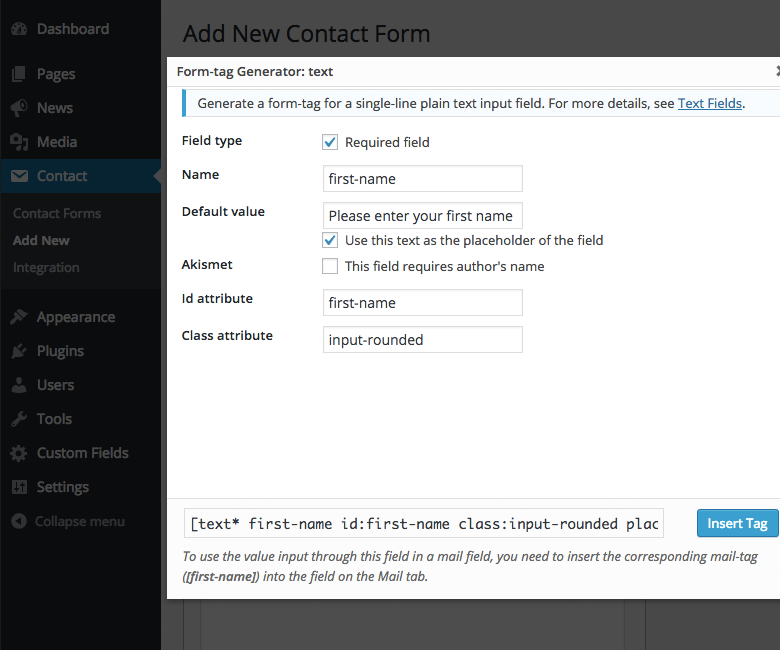
Let’s create a text field in this example.
First of all, click the Text tag. A modal window will now display how you can configure this field. Decide whether you want the field to be mandatory or not.
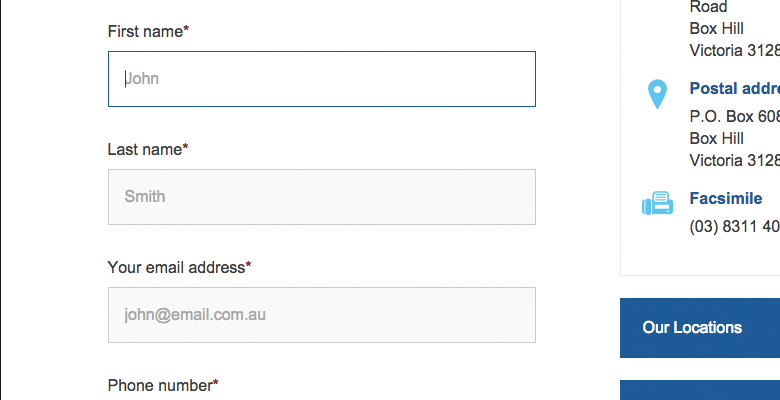
Next, name your field. This name won’t be shown on the front end of the form, but it’s essential to name it clearly using dashes or underscores in place of spaces, so that you can keep track of what the field is and what it’s used for. For example, name it something clear like ‘first-name’.
The default value field is where you can enter some copy and then check the box underneath it, to set it as the default placeholder text in that field. This field gives you the opportunity to provide instructions to people using the form. For example, if this is the ‘first-name’ field, you could add ‘Please enter your first name’. It might seem self-explanatory, but it’s helpful guidance for the end-user – and you can never be too helpful!
The id attribute enables you to associate a label with a field and the class attribute is where you would add any class names to give the field styling. It’s an optional field, but it’s handy when you need to make all form boxes the same or style them with rounded corners, for example.
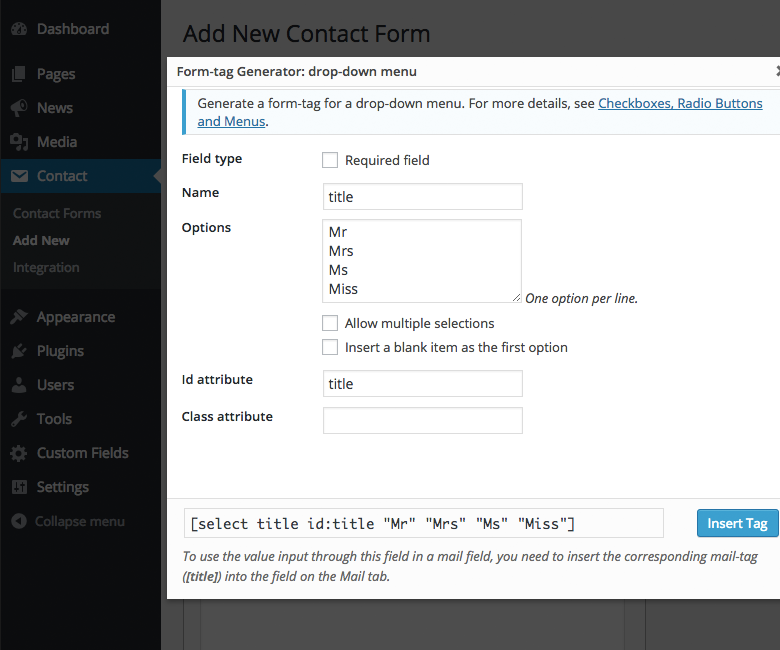
We’re now going to add a drop-down menu to our field, and give people some options.
This is very similar to the text field, except for a couple of differences. Like with the text field, click on the ‘drop-down menu’ tag to start.
Name the drop-down menu and decide whether it’s a mandatory field or not.
In the options box, add the different options you’re providing to people. Remember to only add one per line. There’s no maximum number of options you can create, so it’s all-good to have a long list if that’s what you need.
You can then customise how the drop-down functions – whether you want people to be able to click multiple options or just one. You can also customise how it appears.
Remember to add your id attribute and class if you’re using a particular style. Then, click ‘insert tag’ and it will be added to your form.
Things to remember when getting started.
There are a few general things to remember when you’re setting up your form. These apply to any tags that you’re using, so they’re worth keeping in mind.
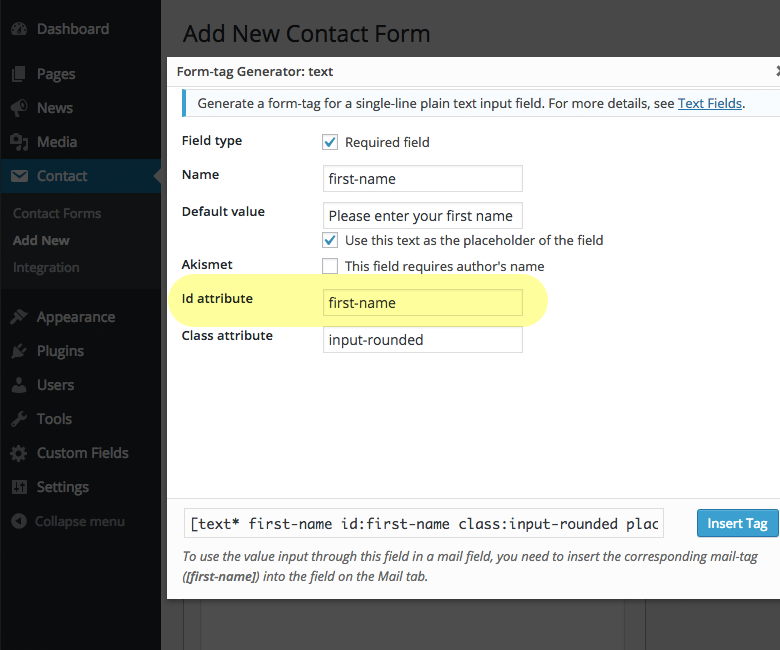
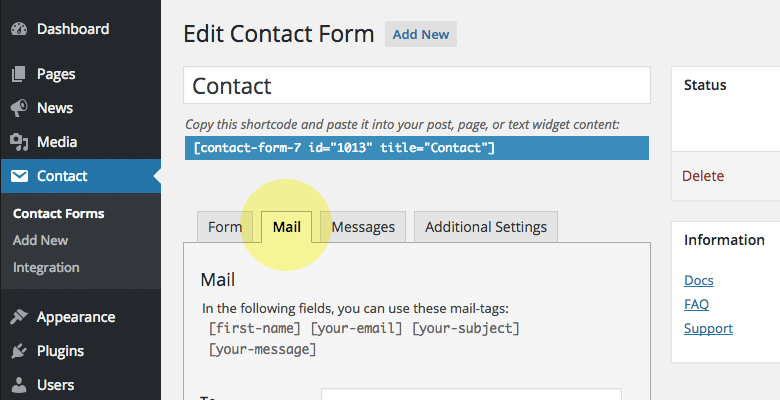
You should always use the id attribute field in your tags. It means that you’ll be applying a unique id to your fields. It will also be essential when you add label text to your form field.
The below screenshot highlights some label text I’ve created that is wrapped in a label tag with a for= parameter. You’ll see that the for= parameter is using the id attribute of the field.
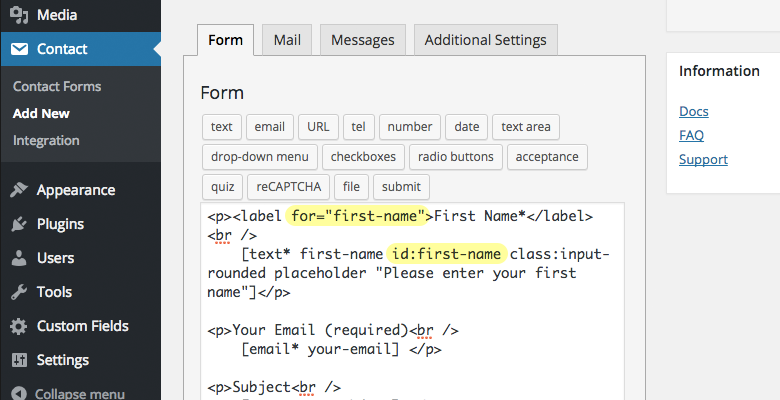
Using labels is helpful for web accessibility and enables screen readers to read the text of your form field. It means that the person using the screen reader can better understand what the field is and what information is required.
Also, by using a label, when someone clicks on that label in the front end, the cursor will move to the field associated with that label to allow the person to begin typing right away.
Don’t be lazy and use text fields for everything in your form. Make sure you’re using appropriate fields.
The telephone field is a great example: it’s identified as the ‘tel’ tag. When filling in the form on a mobile device, it will trigger the number keypad rather than the regular QWERTY keyboard so that the person doesn’t have to fiddle around with their keyboard settings in order to fill in their phone number. It might seem like a small thing, but it’s always a better user experience when you get these small things right.
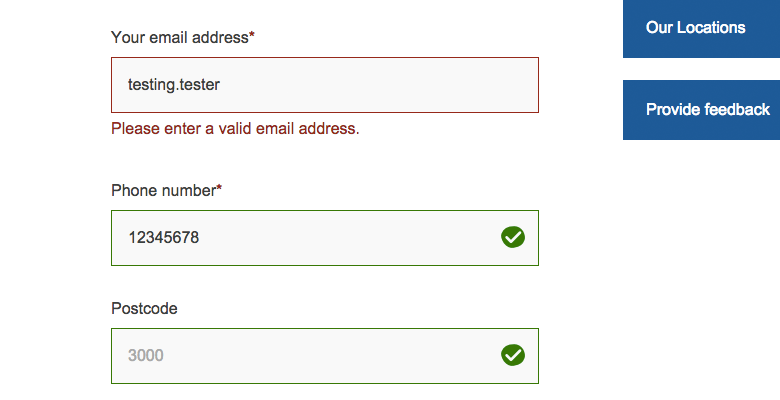
Another good example is the email field. When forms are being filled in, this field will check if a valid email address has been added. So, it will look for the @ symbol as well as domain extensions followed by .com.au, .com, etc
One last helpful thing to remember is an alternative to drop-down menus. You can use radio buttons instead. It’s exactly the same set up as drop-down menus, except the person filling in the form will be able to check a single box instead of selecting from a drop-down menu.

Now that we’ve set up our basic form, it’s time to set up the emails that go with it.
Setting up emails.
Start by clicking on the ‘Mail’ tab in Contact Form 7.
Contact Form 7 will send plain text emails by default. But in both types of emails – the ones going to the website administrator and those going to the person who filled in the form – you can send HTML versions instead.
You can also send both types of emails to multiple people if you need to. This is done through CC and BCC functions, and can be added to the ‘Additional Headers’ field.
Notifying someone that the form has been submitted.
Let’s start with how the notifications work. The form fields that you’ve selected to appear in your form will show up at the top of this area by name.
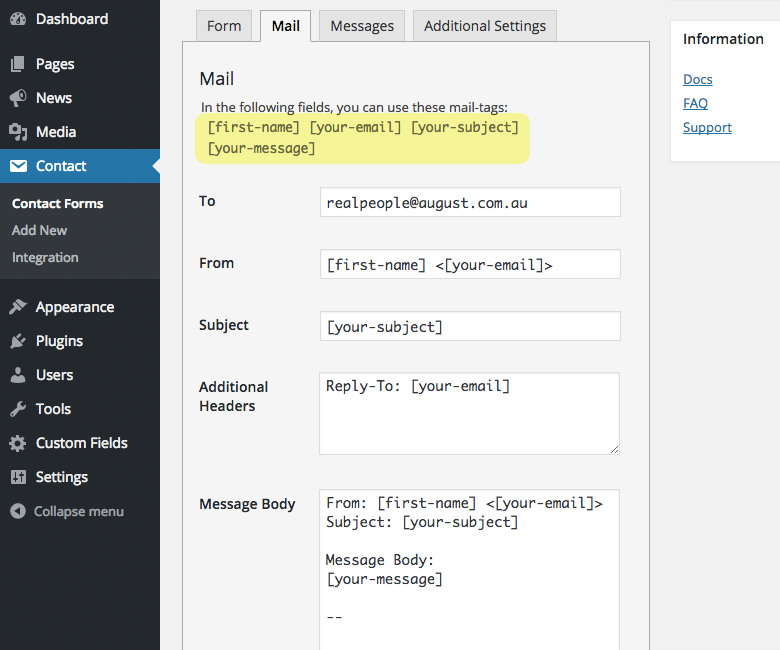
Start by entering the email address of the person who’ll receive notification of a form being submitted. It might be you, your client, your marketing manager or someone else. Don’t forget that you can add multiple recipients in the Additional Headers section.
You can see below that the fields in your form match up with the fields in this Mail tab. For example, who the email is from and their email address. Now, it’s just a matter of entering the extra information you want in this area.
In the message area, you can customise pre-written copy that goes to the administrator or content manager, as well as the details of the form that the person has filled in when submitting the form.
You’ll see a checkbox – ‘Exclude lines with blank mail-tags from output’. If you tick this box, any fields that a person doesn’t provide information for when completing the form won’t be included in the email. Note that this would only apply to plain text emails.
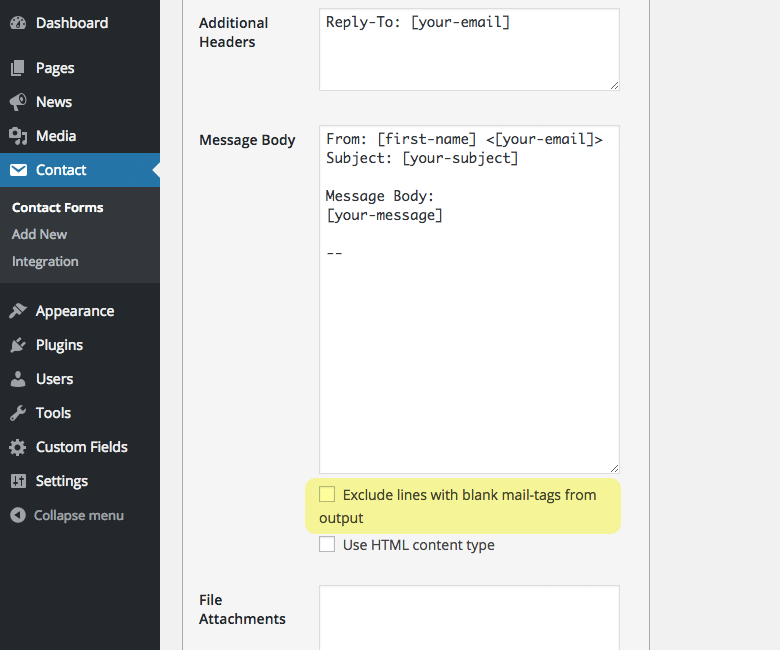
The file attachments box will contain the name of your tag for your form if you included an upload field for the documents.
Adding an autoresponder, also known as Mail (2).
Mail (2) is directly beneath the notification email fields and has exactly the same set-up. You’ll again see the tags of your form fields at the top of this section.

The Mail (2), or autoresponder, is the email sent to the person who filled in the form. You can customise the message content and choose whether to display the email in HTML or leave it as plain text. Remember that this email is plain text by default, so if you need to send an auto response in company branding then add your HTML version.
Once you’ve completed all the mail set up that you need to, hit save and you’re ready to go.
Additional settings.
This is the fourth tab from the left in the Contact Form 7 plugin. It’s included so that you can add extra code snippets and customise things to suit your needs. Essentially, it lets you add other functions to the form.
For example, you could include Google analytics tracking so that you can measure the amount of form completions.
A common feature I normally add is the on_sent_ok function, it’s added the ‘Additional Settings’ field like this:
on_sent_ok: "yourFunction();"Then in your JavaScript file you’ll have something like this:
function yourFunction(){
   // Some custom JavaScript that is
   // executed on successful form submit
};
That covers off getting started with Contact Form 7. It’s a really handy plugin to use for a variety of forms so hopefully once you start using it, you’ll be able to keep creating different types for different user scenarios. Before I wrap up though, there are a couple of extras I want to mention that can help you get even more out of this versatile plugin.
Extras you should know about
Honeypot
This is a great alternative to using a CAPTCHA field. The Honeypot field is hidden from the person filling in the form, but it’s there to catch form-bots, spam-bots… any other kind of bot! A bot won’t know this is a hidden field, so when it enters data the form submission is stopped because the form recognises the Honeypot field shouldn’t contain any information.
It’s a separate plugin to Contact Form 7 that you need to install and activate. Once activated, you’ll see it appear in the form tags available to you within Contact Form 7.
You then enter it the same way as a text field. It doesn’t actually matter where you put it in the form, as a user won’t ever be able to see it.
Contact Form DB
This is an awesome plugin that saves the data from the submitted forms in a database within WordPress, so that you have a record of who has submitted and the information they provided. It means you don’t necessarily have to save all the emails of people submitting your form.
You can then access that database through the WordPress admin at any time.
Again, this is a separate plugin to Contact Form 7, so you’ll need to install and activate it. Once you’ve done that, click into the settings and make sure that the top setting, “Capture form submission from Contact Form 7 Plugin” is set to ‘true’.
The database will only capture form submissions once it’s activated. You won’t be able to capture data retrospectively.
Wrapping up.
That’s pretty much the gist of Contact Form 7. When you consider how simple, adaptable and powerful it can be – from efficiently capturing and collating user info to offering compatibility with a range of other platforms, all while providing a handy range of flexible formatting options – it’s pretty clear that this plugin can help you out in every way, shape and… form. So the next time you’re looking to create and manage contact forms in WordPress, consider giving Contact Form 7 a whirl.
For more tips and tutorials on great plugins, improving your approach to web design or general industry trends and insights, check out our other articles or get in touch with a comment below.
More Articles
Up for some more?
Get your monthly fix of August happenings and our curated Super8 delivered straight to your inbox.
Thanks for signing up.
Stay tuned, the next one isn't far away.
Return to the blog.